Cross Fibre Release: A Practical Guide to Relieving Deep Muscle Tension
Have you ever felt a knot in your shoulder that just won't go away, no matter how much you stretch? Or maybe you have a tight calf that feels like it's made of stone after a long run. Standard stretching often misses the mark because muscles aren't just simple rubber bands. They are complex bundles of fibers running in different directions. This is where cross fibre release comes in. It’s not magic, but it feels like it. By applying pressure perpendicular to the direction of your muscle fibers, you can break up adhesions and restore movement faster than traditional methods.
This technique isn't new, but it is often misunderstood. Most people pull on their muscles (stretching) or press directly into them (trigger point therapy). Cross fibre release does something different: it shears the tissue sideways. Think of it like untangling a knotted rope by rubbing it side-to-side rather than pulling the ends apart. In this guide, we’ll look at exactly how to do this safely, which areas benefit most, and why your body responds so well to this specific type of mechanical stress.
Understanding Muscle Fiber Orientation
To use cross fibre release effectively, you first need to know which way your muscles run. Skeletal muscles are made of fascicles-bundles of muscle fibers-that align along a specific axis. When you flex your bicep, those fibers shorten and thicken. When they get injured or overused, tiny micro-tears occur. As these heal, scar tissue can form between the fibers, gluing them together. This is what creates that stiff, restricted feeling.
If you only stretch longitudinally (along the length of the muscle), you might be pulling on the healthy parts while leaving the glued-up sections stuck. Cross fibre friction works by mechanically separating these layers. Imagine a deck of cards. If you slide them all together, they move as one block. If you shuffle them (apply lateral force), they separate and move independently again. Your muscles work similarly. By moving your fingers or a tool across the grain of the muscle, you encourage the fascia-the connective tissue wrapping each fiber-to slide freely.
You don’t need an anatomy degree to figure this out. Look at your arm when you make a fist. The lines that appear on your forearm tell you the direction of the fibers. Run your thumb across those lines, not with them. That’s the basic principle. For larger muscles like the quadriceps or calves, the fibers generally run from the hip or knee toward the ankle or torso. Identifying this direction is the first step to effective treatment.
How to Perform Cross Fibre Release Safely
The beauty of this technique is that you can do it yourself with minimal equipment. You just need your hands, a tennis ball, or a foam roller. However, technique matters more than pressure. Aggressive digging can cause inflammation, making the problem worse. Here is the step-by-step process for doing it right.
- Locate the tension: Find the area that feels tight or painful. It might feel like a rope or a band under the skin.
- Determine fiber direction: Contract the muscle slightly (e.g., flex your foot if working on the calf) to see which way the fibers bulge. Note this direction.
- Apply perpendicular pressure: Place your thumbs, fingers, or a massage tool across the muscle, at a 90-degree angle to the fibers.
- Maintain contact: Keep steady, moderate pressure. It should feel intense but not sharp or unbearable. Pain is a signal to back off, not push through.
- Move slowly: Slide your tool or fingers back and forth across the grain. Do small movements, about 1-2 inches wide. Don’t rush.
- Repeat: Spend 30-60 seconds on each specific spot. You may feel the tissue soften or hear/feel a slight crackling sensation. This is normal.
A common mistake is using too much speed. Fast friction generates heat, which can irritate nerve endings. Slow, deliberate strokes allow the collagen fibers in the fascia to reorganize. Another error is targeting the bone. Always stay on the soft tissue. If you hit a hard surface, shift your position slightly until you’re pressing on muscle belly again.
Key Areas for Self-Treatment
Not every part of your body needs cross fibre release. Some areas are safer and more effective than others. Here are the top three zones where this technique shines.
| Body Area | Fiber Direction | Common Issue | Tool Recommendation |
|---|---|---|---|
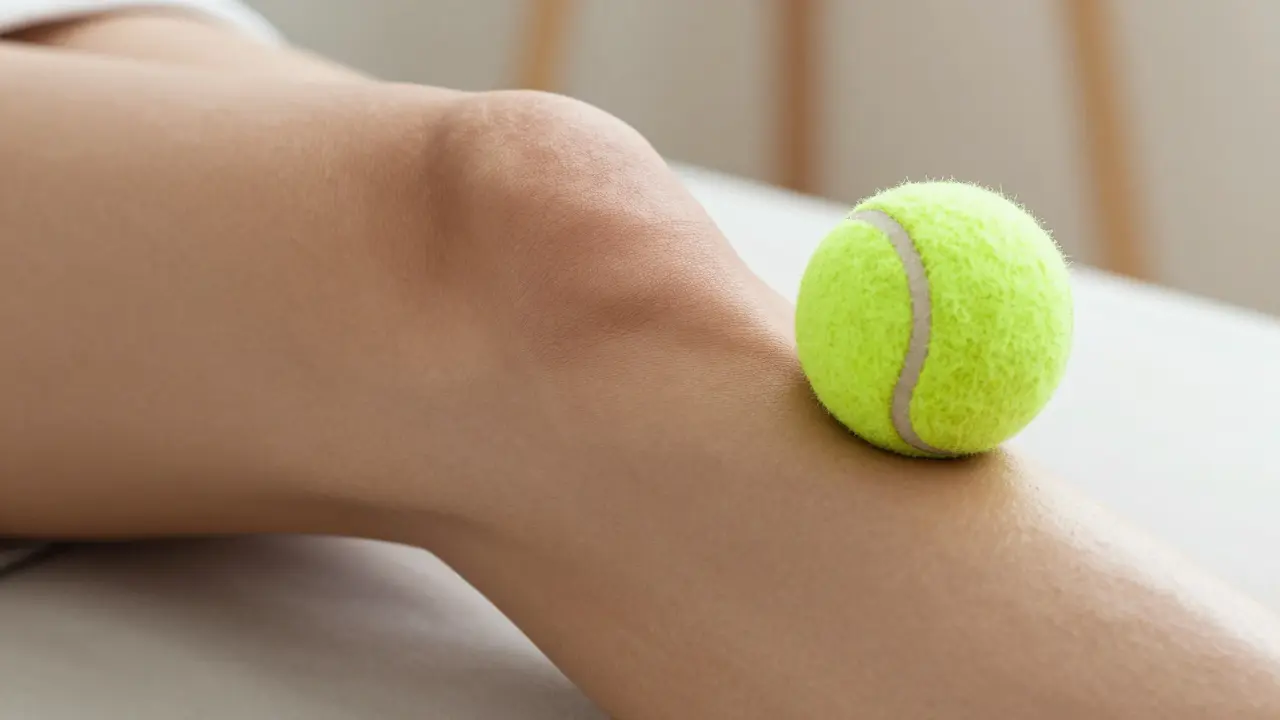
| Calves (Gastrocnemius) | Vertical (Knee to Ankle) | Runner’s cramp, tightness | Tennis ball or hands |
| Forearms | Diagonal/Vertical | Tennis elbow, mouse arm | Thumb or lacrosse ball |
| Upper Back (Trapezius) | Horizontal/Diagonal | Desk posture stiffness | Wall corner or foam roller |
Calves: Sit on the floor with your leg extended. Use a tennis ball under your calf. Roll it up and down to find a tender spot. Once found, stop rolling. Instead, wiggle the ball left and right across the calf muscle. Hold for 30 seconds. This helps runners who suffer from chronic tightness despite regular stretching.
Forearms: Rest your forearm on a table. Use your other hand to press into the fleshy part of the forearm. Move your fingers up and down the arm, perpendicular to the bones. This is excellent for office workers who spend hours typing. It breaks up the adhesions that contribute to repetitive strain injuries.
Upper Back: Stand in a doorway. Lean against the frame so the vertical post presses into your upper back. Shift your weight side to side, letting the doorframe shear across the trapezius muscles. This mimics the manual cross-fibre motion without needing a partner.
Cross Fibre Release vs. Traditional Stretching
Why bother with cross fibre release when you can just touch your toes? The answer lies in how tissues respond to different types of load. Stretching applies tensile stress. It elongates the muscle. While this increases range of motion temporarily, it doesn’t always address the internal stickiness of the fascia. In fact, aggressive stretching can trigger a protective reflex called the myotatic reflex, causing the muscle to tighten further.
Cross fibre release applies shear stress. This type of force is better at breaking down fibrous adhesions. Studies in sports medicine suggest that combining cross-friction massage with gentle stretching yields better long-term flexibility gains than stretching alone. Think of stretching as loosening a screw, and cross fibre release as cleaning the threads so the screw can turn smoothly.
However, cross fibre release isn't a replacement for strength training or mobility work. It’s a preparatory or recovery tool. Use it before exercise to wake up the tissue, or after to help flush out metabolic waste and reduce stiffness. It works best as part of a broader routine that includes movement and strengthening.
When to Avoid Cross Fibre Release
Like any physical intervention, there are times when you should skip it. Safety is paramount. Do not perform cross fibre release on:
- Acute injuries: If you’ve pulled a muscle within the last 48-72 hours, avoid deep friction. It can disrupt the healing process and increase bleeding.
- Open wounds or rashes: Never massage broken skin. Risk of infection is high.
- Blood clots (DVT): If you suspect a deep vein thrombosis, especially in the calf, do not massage the area. This can dislodge a clot, leading to life-threatening complications.
- Fractures: Wait until the bone has fully healed before applying pressure to the surrounding muscle.
- Inflammatory conditions: Conditions like rheumatoid arthritis flares require gentle care, not aggressive friction.
If you experience numbness, tingling, or shooting pain during the technique, stop immediately. These are signs of nerve irritation. Nerves don’t like shear forces as much as muscles do. Adjust your angle or pressure to avoid compressing neural structures.
Integrating Into Your Daily Routine
You don’t need an hour-long session to see benefits. Consistency beats intensity. Try incorporating two minutes of cross fibre release into your daily shower or morning routine. Focus on one problematic area per day. Rotate through your calves, shoulders, and forearms over the course of a week.
Pair it with hydration. Fascia is largely water-based. Dehydrated tissue is sticky and less responsive to manipulation. Drinking water before and after your session helps the tissue glide more easily. Also, consider warming up the area with a warm towel or shower for five minutes before starting. Warm tissue is more pliable and less likely to resist the friction.
Keep a log of what works. Does your calf feel looser after using a tennis ball or your thumbs? Do you prefer slow strokes or slightly faster ones? Everyone’s pain threshold and tissue density are different. Personalizing your approach ensures you get the most out of the technique without causing unnecessary discomfort.
Is cross fibre release the same as deep tissue massage?
No, they are different. Deep tissue massage focuses on applying slow, firm pressure along the muscle fibers to reach deeper layers. Cross fibre release specifically applies pressure perpendicular to the fibers to break up adhesions. You can combine both techniques, but the directional focus is distinct.
How often should I do cross fibre release?
For chronic tightness, daily or every other day is effective. For acute soreness, wait 48 hours after exercise. Listen to your body; if the area remains tender for more than 24 hours after treatment, reduce the frequency or pressure.
Can I use a foam roller for cross fibre release?
Yes, but it requires creativity. Standard rolling is longitudinal. To get a cross-fibre effect, lie sideways on the roller or use a smaller tool like a lacrosse ball or massage gun with a flat attachment, moving it across the grain of the muscle.
Does cross fibre release hurt?
It should feel uncomfortable, like a "good hurt," but not sharp or agonizing. If you wince or hold your breath, you’re pressing too hard. The goal is to create tolerance and release, not trauma. Start light and increase pressure gradually.
Will cross fibre release cure tendonitis?
It can help manage symptoms and improve tissue quality in chronic tendon issues (tendinopathy) by breaking up scar tissue. However, it is not a standalone cure. Strengthening exercises and load management are essential for full recovery from tendonitis.


About Author